When tackling a DIY task, such as replacing a part of the shower assembly, you need to first remove the screws that hold it together. Since showers are exposed to consistent moisture and temperature swings, as well as hard water deposits, stripped screws are very common.
Its an absolute headache to try to work out a fully stripped shower handle screw, and sometimes it just wont be possible. If the head of the screw is completely rounded-over, there are just a few things you can do to get it out.
Stripped screws are usually caused by choosing the incorrect type or size of bit or screwdriver. The use of the wrong bit when either tightening or loosening will, over time wear down the screw head, making it un-usable.
The biggest problem with a shower handle stripped screw is that you are very limited in how to remove it. It takes the proper knowledge, tools and technique to successfully remove a rounded-off screw. Many times, folks will get more and more frustrated and make the situation even worse.
WORST CASE SCENARIO:
“To get a stripped screw out, you will need to drill out the center of the stripped screw. With the right tools, the process is relatively easy,” Says Ryan Womeldorf.
In this post, we will walk through step-by-step instructions on how to remove a stripped screw a shower faucet or handle. I’ll share with you the best techniques and must-have tools when overcoming this frustrating DIY speedbump.
But before diving into the how to guide, let’s first identify the type of screw your shower faucet is using.
Types of Screws Used in Shower Faucet
Nearly all shower assemblies will use one of two types of screws; Allen head or Phillips head. Its important to get know exactly what type you have, to make the job of removing the screws that much easier and quicker.
Taking a look at your shower hardware, you can easily identify what type of screws are used in your shower faucet or handle. We show them clearly here below:

Allen Screw; How to Identify?
Allen Screws (also known as hex screws) have a distinct hexagonal design. The opening is large compared to Phillips. Note that the Allen head has 6 sides to it.
An Allen screw is very durable by design, more so than a Phillips. They are widely-used in premium bathroom fixtures. These types of screws are removable using hex-key wrenches or hex driver bits.
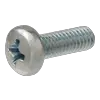
Phillips Screw; How to Identify?
Phillips Screws (also known as crosshead or star screws) are commonly used throughout all types of home fixtures. The head is easily identified by its distinct cross or plus-sign style. Note that the Phillips head is very easily stripped when using the wrong size of bit.
A Phillips screw is likely the most common type of fastener and screwdriver you would have in a home. Removing this style of screw with a Phillips screwdriver is your best bet.
Getting Ready With Right Tools
To remove a shower handle stripped screw, get yourself ready with the right tools. Using the proper tool at the right time will save you a world of headaches. I guarantee it! Using the wrong size or type of screw driver will undoubtedly make the situation worse.
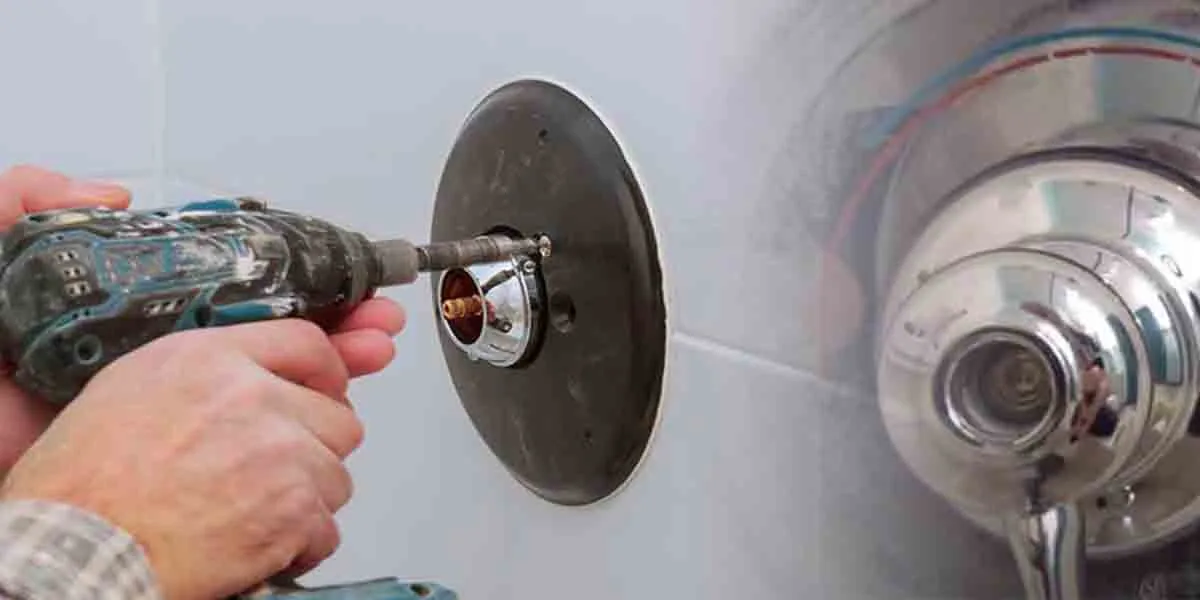
Cordless Drill for Removing Stripped Screw

A cordless drill is very effective tool to use when it comes to a worse-case scenario stripped screw. When it comes to drilling out a completely rounded-out screw head, you won’t be doing it by hand! A drill makes short work of that. Quickly and easily.
When dealing with a partially stripped screw head, you absolutely DO NOT want to try to use a power drill! It is best to use a screwdriver or hex wrench (depending on type of screw head) to carefully back the screw out. Take your time and get it done right with no further damage. See below for more techniques on how to do this!
One of the best all-around cordless drills on the market today is the DeWalt 20v Max Cordless Drill. I’ve had one for a few years, use it all the time and have always been impressed by its battery life, durability and power.
High Quality Drill Bits

To go along with the power drill, you will need a set of high quality drill bits. Having a good selection of sizes will make the job easier, as sizing up and down is necessary depending on the screws. Make sure the drill bit you use is rated to drill into metal, a wood bit will be of no use!
Just like the cordless drill, DeWalt also makes a very nice titanium drill bit set. These drill bits are perfect for almost any sorts of drilling that an average homeowner or DIYer will encounter.
Screw Extractor Kit

Here is the secret weapon in removing stuck screws; the screw extractor bits. These awesome little guys can make short work of stuck and stripped screws. They have a double-sided bit. One side is for pre-drilling, the other is reverse threaded. They are designed to bite into the stripped screw, forcing it out with brute strength.
Getting a good set of extractors will mean you are future-proofing your household from any pesky rounded-off screws in the future. This set of damaged screw extractors is a great deal at Amazon and has all the sizes you should likely need.
Adjustable Wrench

Keep an adjustable wrench handy as it will help in holding screw extractor bits when removing stripped screws.
How to Remove A Stripped Screw from Shower Faucet
Step 1 – Prepare the Drill Machine
First, you have to prepare the drilling machine before you begin the drilling process. Identify the type of screw your shower faucet is using; can be either u003cstrongu003eu003cemu003eAllen or Phillips Screwu003c/emu003eu003c/strongu003e. Once you identify, select the correct size drill bit, which must fit the stripped screw comfortably without stretching the gap.
Step 2 – Start Drilling A Hole
While holding the drill machine steady, place the drill bit on the screw head, making an angle of 90 degrees. Once all set, start drilling through the center until it reaches the rear end of the screw, then remove the drill bit carefully.
Step 3 – Drill Out the Screw Head
Now, switch the current drill bit to a new one. Make sure it matches the screw head’s diameter for great results. Again, place your drill and start drilling out the screw head until you sense you’ve reached inside diameter.
Step 4 – Insert the Screw Extractor
You’re Almost Done!u003cbru003eu003cbru003eIt’s time to select the right-sized screw extractor bit from the kit and insert it into the hole we did. Ensure if the screw extractor bit fits perfectly into the drill hole. In some cases, you’ll need to drill the hole a little bigger; if the screw extractor bit doesn’t fit.
Step 5 – Finally, Remove the Screw
Take out your adjustable wrench and attach it to the screw extractor bit. Hold tightly and rotate the bit counterclockwise. You’ll notice the stripped screw finally getting off from the shower faucet. u003cbru003eu003cbru003eWell Done! Now you can continue replacing the parts or whatever reason you were trying to remove the stripped screw.
Additional Tips to Remove A Stripped Screw
Use A Rubber Band
Rubber bands are popular for removing a stripped screw. It works perfectly in filling the gaps caused by the stripping of screw heads. The concept is when you add a rubber band to the head, it adds extra traction (grip), making the removal much easy.

Here’s how you can make a rubber band work in stripped screw removal:
- First, place the rubber band on the top of the screw head. In doing so, you’re creating friction between screw and removal tool (could be screwdriver or drill).
- Start unscrewing with a rubber band in place. The grip created due to the place rubber band will help get the stripped screw out.
For Phillips Screw Heads
If you’re dealing with a Phillips screw head also known as crosshead screws, then use a flat head screwdriver along with a rubber band placed on the top.
Doing this introduces enough grip for your screwdriver. By applying a little force downward and rotating it counterclockwise will get it removed.
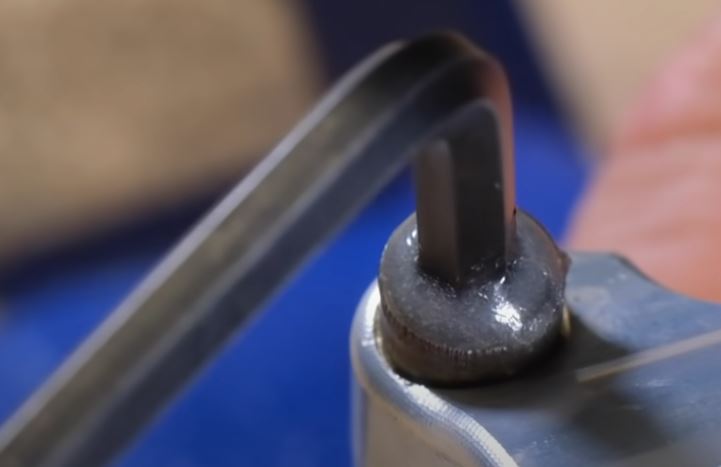
Bond Allen Key to Screw Bolt
This bonding method works perfectly for Allen head screws. The concept says – “If the screw head is an Allen type, you can bond an Allen key to the stripped screw head to remove it.”
For this process, get an Allen key that you won’t regret throwing after usage. It doesn’t need to be a high-quality Allen key, you can find cheap Allen keys in the market that can come in handy for situations like this. Also, the process does require strong adhesive glue.
I recommend using Araldite Strong Adhesive Glue which is a two-part formula, so take a little amount from each tube and mix them to get the final mixture.
How to Remove a Stripped Hex Screw:
- Take Araldite adhesive glue’s mixture and fill the head of the screw with it.
- Stick the Allen Key on top of screw head and wait for it to settle down.
- Leave it overnight so that it gets really hard.
- Once a strong bond is created, you can turn the Allen Key to get your stripped screw removed.
See Also: 7 Ways to Remove A Stripped Screw
Here’s How to Avoid Stripping the Screws Again
Here are a few tips to avoid stripping a screw:
- Do not apply too much pressure when working with drill machines.
- Always make a 90 degree angle while drilling.
- Make sure the tip is fully seated into the screw head before screwing or unscrewing.
- Use correct screwdriver of appropriate size and design.
- Use correct size drill bit.
Read More
- How to Remove An American Standard Shower Handle?
- How to Remove A Shower Head That Is Glued On?
- How to Remove a Stuck Shower Arm? (Only 3 Steps)