A gap between your bathtub and wall is left on purpose so that it can adjust its length according to the movement by external loads (such as your weight).
This doesn’t mean a gap like that should be kept unsealed. Unsealed gaps of a bathtub are an invitation to mold, mildew, and water damage.
According to Energy Saver, a house owner should always consider sealing the gaps to prevent water damage inside and outside of bathtubs.
If you think of it as a complicated job, Don’t worry! You can fill these gaps on your own by using a material called Caulk.
Related Posts
- 6 Alternatives to Caulking Around the Bathtub (Must-Try!)
- 5 Tips On How to Make Caulk Dry Faster (Silicone, Latex & Polyurethane)
- How to Smooth Caulk Like a Professional
What is Caulk?
A Caulk is a sealing material used to seal cracks, joints, gaps, or seams around various areas of your home. They are one of the flexible sealing compounds which fill up gaps and cracks, protecting against leakage of air, water, dust, insects, etc.
When you avoid sealing, moisture can reach through these gaps and can damage the materials behind your bathtub. In addition, this could also result in the growth of mold, mildew, fungus, and bacteria.
Therefore, when you notice such gaps around your home, they need to be filled with Caulk as soon as possible. But, how large of a gap can be filled with a Caulk?
How Large Of A Gap Can You Fill with Caulk?
If the gap sizes up to 1/4 inch, it is always recommended to fill the gap with a single bead of caulk (A line of caulk is called bead). For larger gaps of more than 1/4 inch, first, fill the rear end with a foam backer rod (also known as the spine), then apply a caulk layer.
Backer rods are flexible and mostly used to control the amount of caulking used. It creates a barrier to allow the right amount of caulk to fill gaps wider than 1/4 inch.
Basically, you will find two types of backer rods – closed-cell foam rods and open-cell backer rods.
For indoors, open-cell backer rods are preferred as it is less dense and flexible. On the other hand, closed-cell foam is mostly used for outdoor sealing because it is much harder and denser.
So which of them will be suitable for filling larger gaps in a bathtub? Quite obviously, an open-cell backer rod will do the work.
Therefore, you can visit any nearby hardware store or purchase from an e-commerce store. When purchasing a backer rod foam, ensure selecting an appropriate size that fits into the gap.
What Is the Best Type of Bathtub Caulk?
| Caulk Type | Properties | Suitability |
| Silicone | Mold and mildew resistance. Highly flexible and less likely to crack, peel, and distort. | Ideal for sealing gaps around bathtubs, sinks, and showers due to its high water resistance. |
| Acrylic Latex | Most common for general purpose. Easy to work with and can be painted over. | Suitable for smaller and less exposed areas. Not the best choice for areas with high moisture levels. |
| Acrylic Tile Sealant | Comes in small tubes and is commonly used for wet applications. Can resist mold and mildew. | Works well for sealing gaps around tiles and other flat surfaces. Good for bathrooms with high humidity. |
| Vinyl Latex | Lasts longer than general purpose Acrylic Latex. Resistant to UV light and harsh weather conditions. | Ideal for larger gaps and areas exposed to outdoor weather. Suitable for indoor and outdoor use. |
| Polyurethane | Highly durable and professional grade. Used in road repair, plumbing, construction. Resists damage from oils and solvents. | Best for heavy-duty applications and can be used for sealing gaps in a variety of materials including wood, concrete, and metal. Not typically necessary for most bathroom applications. |
Silicone caulks are most suited for tub and shower materials. They have an antimicrobial additive to prevent mold and mildew to bui
ld up. In addition, caulks made of pure silicone are durable enough to seal cracks in masonry and concrete.
In addition, Silicone caulks are not sensitive to temperature changes, which makes them suitable for extreme environments. Therefore, it is recommended to choose pure silicone for the project around your bathroom.

How to Fill Large Gap Between Bathtub and Wall
Material Required: A Razor Blade | Corner Grooving Tool | Rubbing Alcohol | Painter’s Tape | Caulking Gun
Step 1: Take Precautions
First, cover your entire bathtub with a cloth. The purpose of doing this is to avoid scratches and residue falling over the tub.
Step 2: Remove the Old Caulking
Take a razor blade and start gently cutting or scraping away all the remaining caulk before applying a fresh layer. If you don’t get rid of the old caulking, the new caulk will look pretty messy if any old stuff shows through. It also makes it hard for the new caulking to stick.
So to remove, keep a razor blade handy and cut out the previous caulking.
Once done, clean up all the debris from the tub. For tub corners, better to use a corner grooving tool than the razor blade.
Still, if you find some stuck residue, repeat the process until it is cleared completely.
Step 3: Clean Surface with Rubbing Alcohol
Once removing the old caulking completely, use rubbing alcohol to clean the surface where you removed the old caulking.
While applying, take care of ventilation by making sure the vent fans are turned on, or opening a window will also work.
Step 4: Surround Bathtub with Painter’s Tape
To get a straight bead for caulking, add painter’s tape on the tub by leaving a gap of about a quarter an inch away from the wall.
Then, do the same thing for the wall, but this time leave a gap of a quarter an inch away from the bathtub.
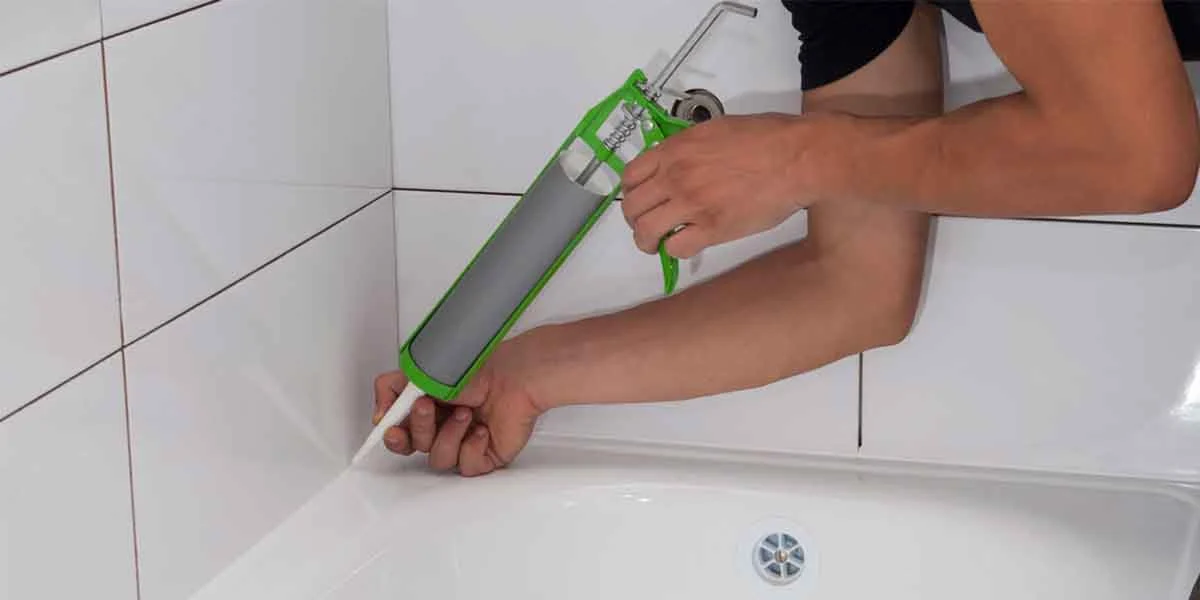
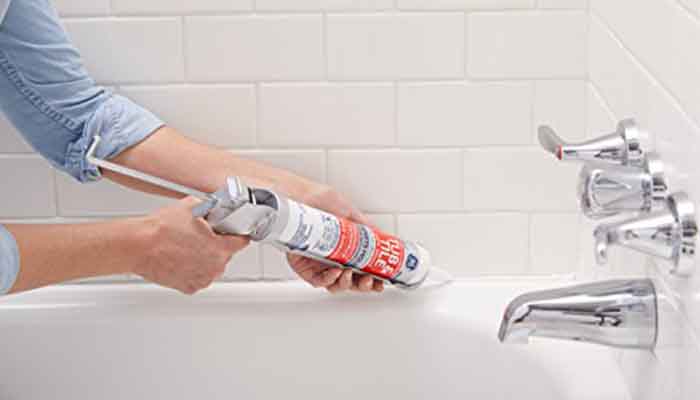
Step 5: Apply Caulk
Now, cut the tip of your caulk and apply it between the painter’s tape lines.
For doing this professionally, you’ll need a caulking gun as it produces a steady pressure on the tube, so you get a smoother result.
Step 6: Trace Back Over the Caulking Lines
Now, you have to trace back over the caulking lines using your fingers. To do this, take your finger and gently place it in the corner, then start moving it evenly over the caulking lines.
Repeat this process until you fill up all the corners that need to be caulked. Then, remove the painter’s tape just after the application while the layer is still wet.
Step 7: Let the Caulk Dry & It’s Done
Finally, you have to wait for the applied caulking to dry. Leave it for about 30 minutes, and don’t try to use your shower during this time.
Usually, caulking takes a day to cure. Therefore, it is advised to leave for a day without touching.
See Also: 5 Tips On How to Make Caulk Dry Faster (Silicone, Latex & Polyurethane)
Wrap Up
Usually, caulks around a bathtub last for at least five years. But sometimes, for poor caulking, the old caulk starts to wear off.
Therefore, When you notice the old caulk peeling away, it is necessary to fill the gaps to protect against air leakage. Avoiding this leads to the formation of mold and mildew.
Also, always remember to choose the right caulk for the purpose. There are various types of caulk sealants available in the market for various purposes. If you’re filling out gaps for your bathroom’s fixtures, such as bathtubs, then select a caulk made of 100% silicone.
Pure silicone caulks are highly flexible and resistant to water, temperature, and environmental conditions. Thus, blocking leakage of air, water, dust, insects, etc.
If you’ve any queries, feel free to drop a comment. You will get your answer within 24 hours.