Plastic bathtubs are very affordable and easy to install, making them a popular budget-friendly choice for builders and homeowners alike. These acrylic plastic bathtubs come with a bit of a downside when compared to other, more expensive (and durable) styles of enameled steel, fiberglass and porcelain tubs.
The problem with plastic bathtubs is that they are more prone to cracking than any other type of tub. Accidents such as dropping sharp or heavy objects into the tub can cause chips and cracks in the bathtub surface. These need to be fixed promptly to avoid water damage to your bathroom.
Choosing to tackle this project yourself could save you hundreds or probably thousands of dollars as compared to hiring a contractor. Luckily, you can easily repair an acrylic plastic bathtub yourself, avoiding the costly remodel of your bathroom. If the crack is not too big, expect the repair to be fairly easy and last a very long time!
Possible Causes of Cracks in a Plastic Bathtub
Lets first try to find the main causes of cracks in plastic tubs, so that you could hopefully avoid them in the future. Keeping the structural integrity of your bathtub is very important, as any moisture penetration underneath or behind your tub will cause costly repairs in the future.
Here are the four main reasons that can cause your plastic bathtub to crack:
1. Poor Installation
Bathtubs installed without providing enough bottom structural support will cause its integrity to weaken. This is especially important with acrylic and fiberglass bathtubs. Always make sure to follow manufacturers instructions for placement of bottom shoring support sections. Without this, your tub will flex with the weight of water and occupants standing, causing stress cracks over time.
2. Pressure Impact
I think this is the most probable cause for most cracks in plastic tubs. An accidental drop of a heavy object or sharp object onto the tub is a likely culprit. A hard impact of even a slip and fall into the tub could crack the surface.
3. Wear & Tear
Cracks can be a result of years of wear and tear, which is inevitable. If you have many surface stress cracks on your older tub, it may be time to replace it.
4. Using Highly Abrasive Cleaners
Highly abrasive cleaners may cause harm by eroding the layers of your bathtub over time. The weakening of the surface, in addition to regular usage could cause surface cracks and failure. Following the proper steps to safely clean your tub is very important.
How To Fix a Crack in a Plastic Bathtub
This is a DIY skill that is probably daunting if you’ve never tried it before. But let me assure you, its an easy process with the right tools and preparation. If you have never had to fix cracks in a plastic bathtub, don’t worry because we will guide you on each step.
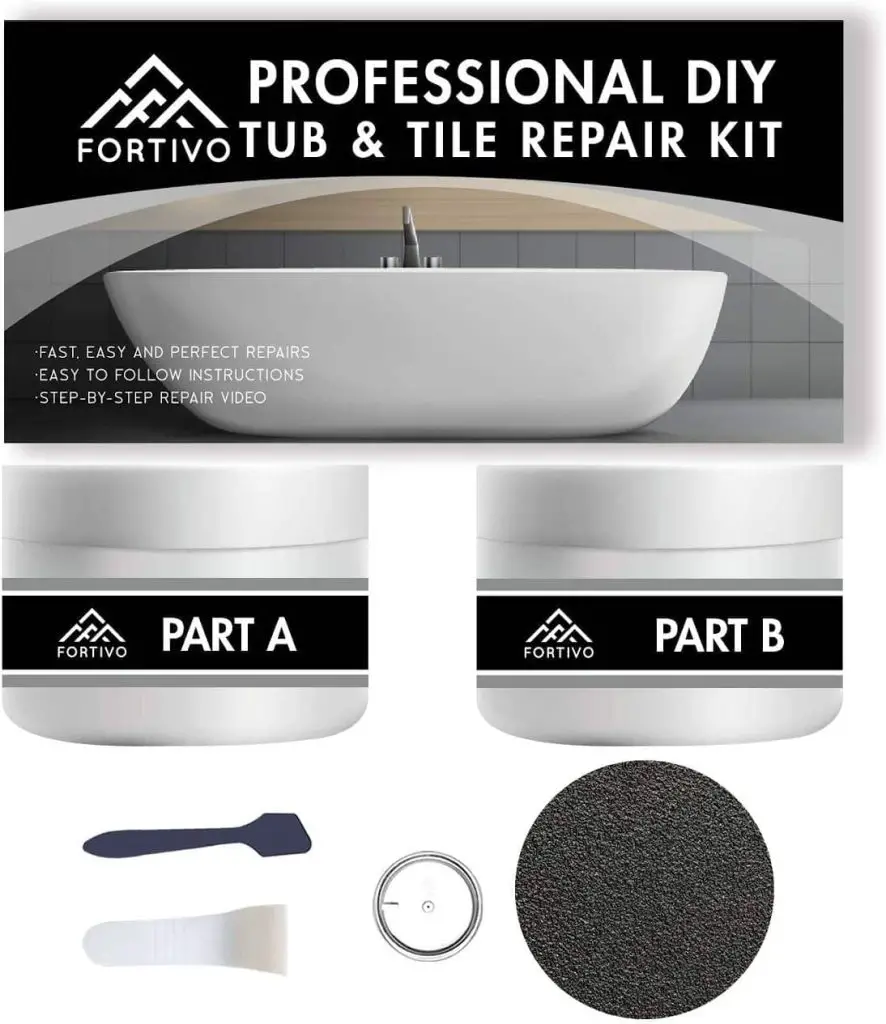
I recommend a all in one bathtub repair kit for most people. This ensures you get a close match in color, plus it has everything you need all included. They really aren’t very expensive either at under $40. Before you begin, make sure to have the follow essentials at hand for your bathtub repair:
- A rag or paper towel
- Acrylic bathtub repair kit (my recommended kit pictured below)

To fix cracks in your plastic bathtub, follow our step-by-step guide below:
Step 1: Clean Your Bathtub
Clean your bathtub extremely well using a good cleaning solution to remove all grime or residue. Wipe down with a dry towel or paper towel. Only a completely dry tub surface can be repaired with the epoxy!
Step 2: Identify all Cracks to Repair
Go through your entire tub, checking for all cracks or scuffs and abrasions you want to repair. Since you are getting the epoxy out and ready, you may as well touch up any imperfections you have on your tubs surface. This is why I love using the all-in-one kits, as they are a near perfect color match for most tubs! It may help to use painters tape to mark out each repair spot if you have several.
Step 3: Prep by Sanding the Cracks
Take sandpaper and use it to lightly sand down the cracks and the surrounding 1/4 inch around them. This will ensure the repair epoxy bonds permanently to the tubs surface. Skipping this step will cause problems down the road, don’t skip it!
Step 4: Clean the Sanded Area
Use a vacuum cleaner to clean off all sanding debris, or wipe down with a damp cloth or paper towel. If you use the damp cloth method, wait for 15 minutes for the surface to dry before continuing to next step.
Step 5: Prepare Epoxy Resin and Apply
No matter the type of bathtub repair epoxy you choose, make sure to carefully read the instructions! Every kit is a bit different, and the epoxy resin package instructions will give you the exact instructions for their product.
After mixing the epoxy resin, quickly but meticulously fill the desired repair areas using a putty knife. Push the epoxy firmly into the repair areas and cracks. Scrape over the repair area with the putty knife, . Leave the epoxy just a bit higher as it will be sanded down after cured.
Step 6: Sand Over the Crack Repairs
After waiting the specified time for the repair epoxy to cure, you can move to the finishing step of sanding. For some kits, it is recommended to wait a full 24 hours before sanding and usage.
Using wet/dry sandpaper, sand down your repaired areas carefully. Make sure to not over do it here, and take your time. This is your final product, so it pays to have patience and attention to detail here. After each sanding pass, rub your hand gently over the surface of the repair to feel for any imperfections. Keep sanding and checking with your hand until you are happy with the results.
Step 7: Final Cleanup and Enjoy
Finish off your tub repair process with a final cleanup of the sanding debris. You can now enjoy you tub worry-free of any leaks and unsightly cracks or blemishes! Good job!
See Also: 4 Temporary Fixes For Cracked Bathtub (Must-Try!)
Tips To Prevent Damage and Care for Plastic Bathtubs
Good maintenance of your bathtub is essential as it prevents risks of damage and makes your bathtub last as long as possible.
Below are tips that will help you care and prevent cracks;
- Keep heavy or sharp objects out of the plastic bathtub.
- If you are interested in your decorating in your bathtub/shower, pick light-weight decorations that are also secure without sharp edges and tips.
- To protect the enamel layer of your bathtub, we recommend using a nonabrasive and gentle cleaner. For deep cleaning, use homemade cleaners made from vinegar, lemon, essential oil, baking soda, and water.
Are Acrylic and Plastic Bathtubs the Same?
Yes an acrylic bathtub is also known as a plastic bathtub. Acrylic tubs are made from an acrylic polymer, a clear plastic material that has been mixed with other resins to make it stronger. It is less expensive than cast-iron tubs and easier to maintain. They are more lightweight than cast-iron tubs, so they can be installed in any bathroom easily. They come in different shapes and sizes, but they all share the same properties: lightweight, easy installation, inexpensive price tag, and low maintenance cost.
Wrap Up
Using the above step-by-step guide, you can successfully fix cracks in your plastic bathtub, saving the large costs of replacing it.
I hope this helps, and you now have the confidence to tackle this fairly simple DIY bathroom project on your own!
Read More On Fixing Bathtubs


